Welcome!

WELCOME


Welcome to the blog for our trailer hot tub build.

This project began at the beginning of April 2020, just after 'lockdown' was announced in the UK due to COVID-19. We were supposed to be touring Europe in our campervan but this obviously wasn't going to be possible... We were not allowed out to socialise or travel, so figured we needed a pretty ambitious project to keep us occupied during however many weeks we would be stuck at home.

We tried to build this for as little as possible, recycling and utilising materials left over from other projects, things hoarded in garages, donations from friends, other people's trash, innovating home-made solutions and hard work! The basic materials were an IBC tank, an old fence, a surplus trailer and some leftover decking. It was difficult to acquire materials via delivery/collection due to the lockdown, so we had to improvise a lot!

The whole project took us about 6 weeks in total, and we were working on this most days. We're fortunate in that Elliot has his own fully-equipped workshop with many many useful tools and bits and pieces so it meant we could work on the project while adhering to government rules regarding social distancing.

It is completely portable on its trailer and runs independently off a 32kw gas boiler and a 12v battery, so it can be used anywhere there is water. It is complete with water pump, seating for 2-4 people, 12v and USB chargers, LED lights and bubbles. Most importantly it has successfully kept us amused for 8 full weeks!

None of it was very planned, we had a basic idea and just ran with it. Lots of things went wrong or didn't work, and we've had SO much fun building this. (And I've learned a lot of useful DIY skills!)

This is a blog of the full build, complete with a million photos and videos. I make no apologies that this blog is very haphazard, photo and video heavy, and might not make a huge amount of sense. The primary purpose of this blog is to document this build both for our own records, and for anyone else who's interested.

We plan on towing it around Scotland when travel restrictions are relaxed enough to allow this (in our new campervan conversion... which is the next project... I'll blog about that here too) and enjoying a home-made hot tub in the most beautiful locations we can find.

Disclaimer: This is NOT meant as a tutorial. Do not try this at home. Always seek professional expert advice. Hot tub not inspected by gas-safe engineer. Appropriate PPE pretty much never worn.

Nobody died :)

FAQ!
Didn't quite anticipate this being so popular so here's some FAQ!

How long did this take to build?
About 6 weeks.

How much did it cost to build?
About £500. See here for a breakdown of costs. But bear in mind we had so much materials already, and were very fortunate in being donated a lot of materials too. We also already had a fully equipped workshop with the right tools and consumables.

Can you make me one?
Yes, we can make you one. But it will cost significantly more than this original one which as we'd have to buy all the materials we fortunately already had and of course cover our time.

How long does it take to fill/heat?
It takes about an hour to fill up 750L of water. The water is pumped into the tank via the boiler so it is 'hot filled' and ready to use at 40+ degrees as soon as it's filled. There's no waiting for it to heat up.

Where do you get the water from?
The hot tub has a hose connector so can be filled from any hose, but also comes with a built in water pump, so water can be pumped from any natural water source.

How much does it cost to run?
About £3 to initially hot-fill, and about 10p to reheat when it starts to loose temperature (after about 2 hours)

A tank of propane gas costs about £30 and we can hot-fill 750L of water about 10 times with one cylinder.

How can you tow it when full of water?!
It's not designed to be towed full of water! The idea is that we park up close to a natural water source, pump water from this, use it and drain the water back where it came from. We will only use it for a day or two at a time so there's no need for chemicals and it'll be safe to drain back to the environment.

How long does it stay warm for?
A long time! It's fully insulated but even we were surprised at how well it holds heat. When initially hot-filled at 40 degrees it will maintain hot-tub temperature for about 2 hours without the boiler. When the temperature starts to drop, the boiler can be fired up for about a minute to return it to 40+ degrees. It also retains temperature well overnight, dropping about 2 degrees.

Can I share this??
Of course, just make sure you credit back to us :) Maybe include a link back to this blog trailerhottub.blogspot.com

How are you going to keep busy now?!
We've decided to sell our campervan (eBay advert here by the way) and convert a new one. I will blog about that here

Find us on Facebook
Find us on Instagram

Thursday 4 June 2020

Seating fixing

So the major problem encountered was that the decking seating was not affixed to the base of the tub, so as soon as it was filled with water, the bouyancy of the wood caused the seats to float. Even with one of us sitting on them, they still wanted to float.

So we fashioned some fixings from stainless steel, which was cut to size, shined up with a grinder, and bent to shape.


The underside of the seats was 'dotted' with Sikaflex to create a rubbery base so there's no chafing of the wood on the IBC. (The Sikaflex won't actually adhere to the IBC material).


The steel was slotted under the top of the hot tub, so they remain removable for cleaning, but we have no issues with us floating away! 


Wednesday 20 May 2020

Evaluation and afterthoughts...


It all works! We spent a glorious evening in the tub in the garden, tinkering with the controls, drinking fizz and looking at the stars.

We filled it from a very very slow tap with a very shit hose which took about an hour, and filled it via the boiler so it was 'hot filled' at 40 degrees and ready to use as soon as it was filled. We estimate we used about 1/10th of the cylinder of gas, meaning it costs about £3 to hot fill.

We were surprised at how long it holds the heat for, and we didn't turn the boiler back on for well over two hours. Just 1 minute of boiler time and it's too hot to handle! This means to keep it at temperature it costs about 10p every 2 hours (!) The bubbles work and the LED lights look awesome in the dark.

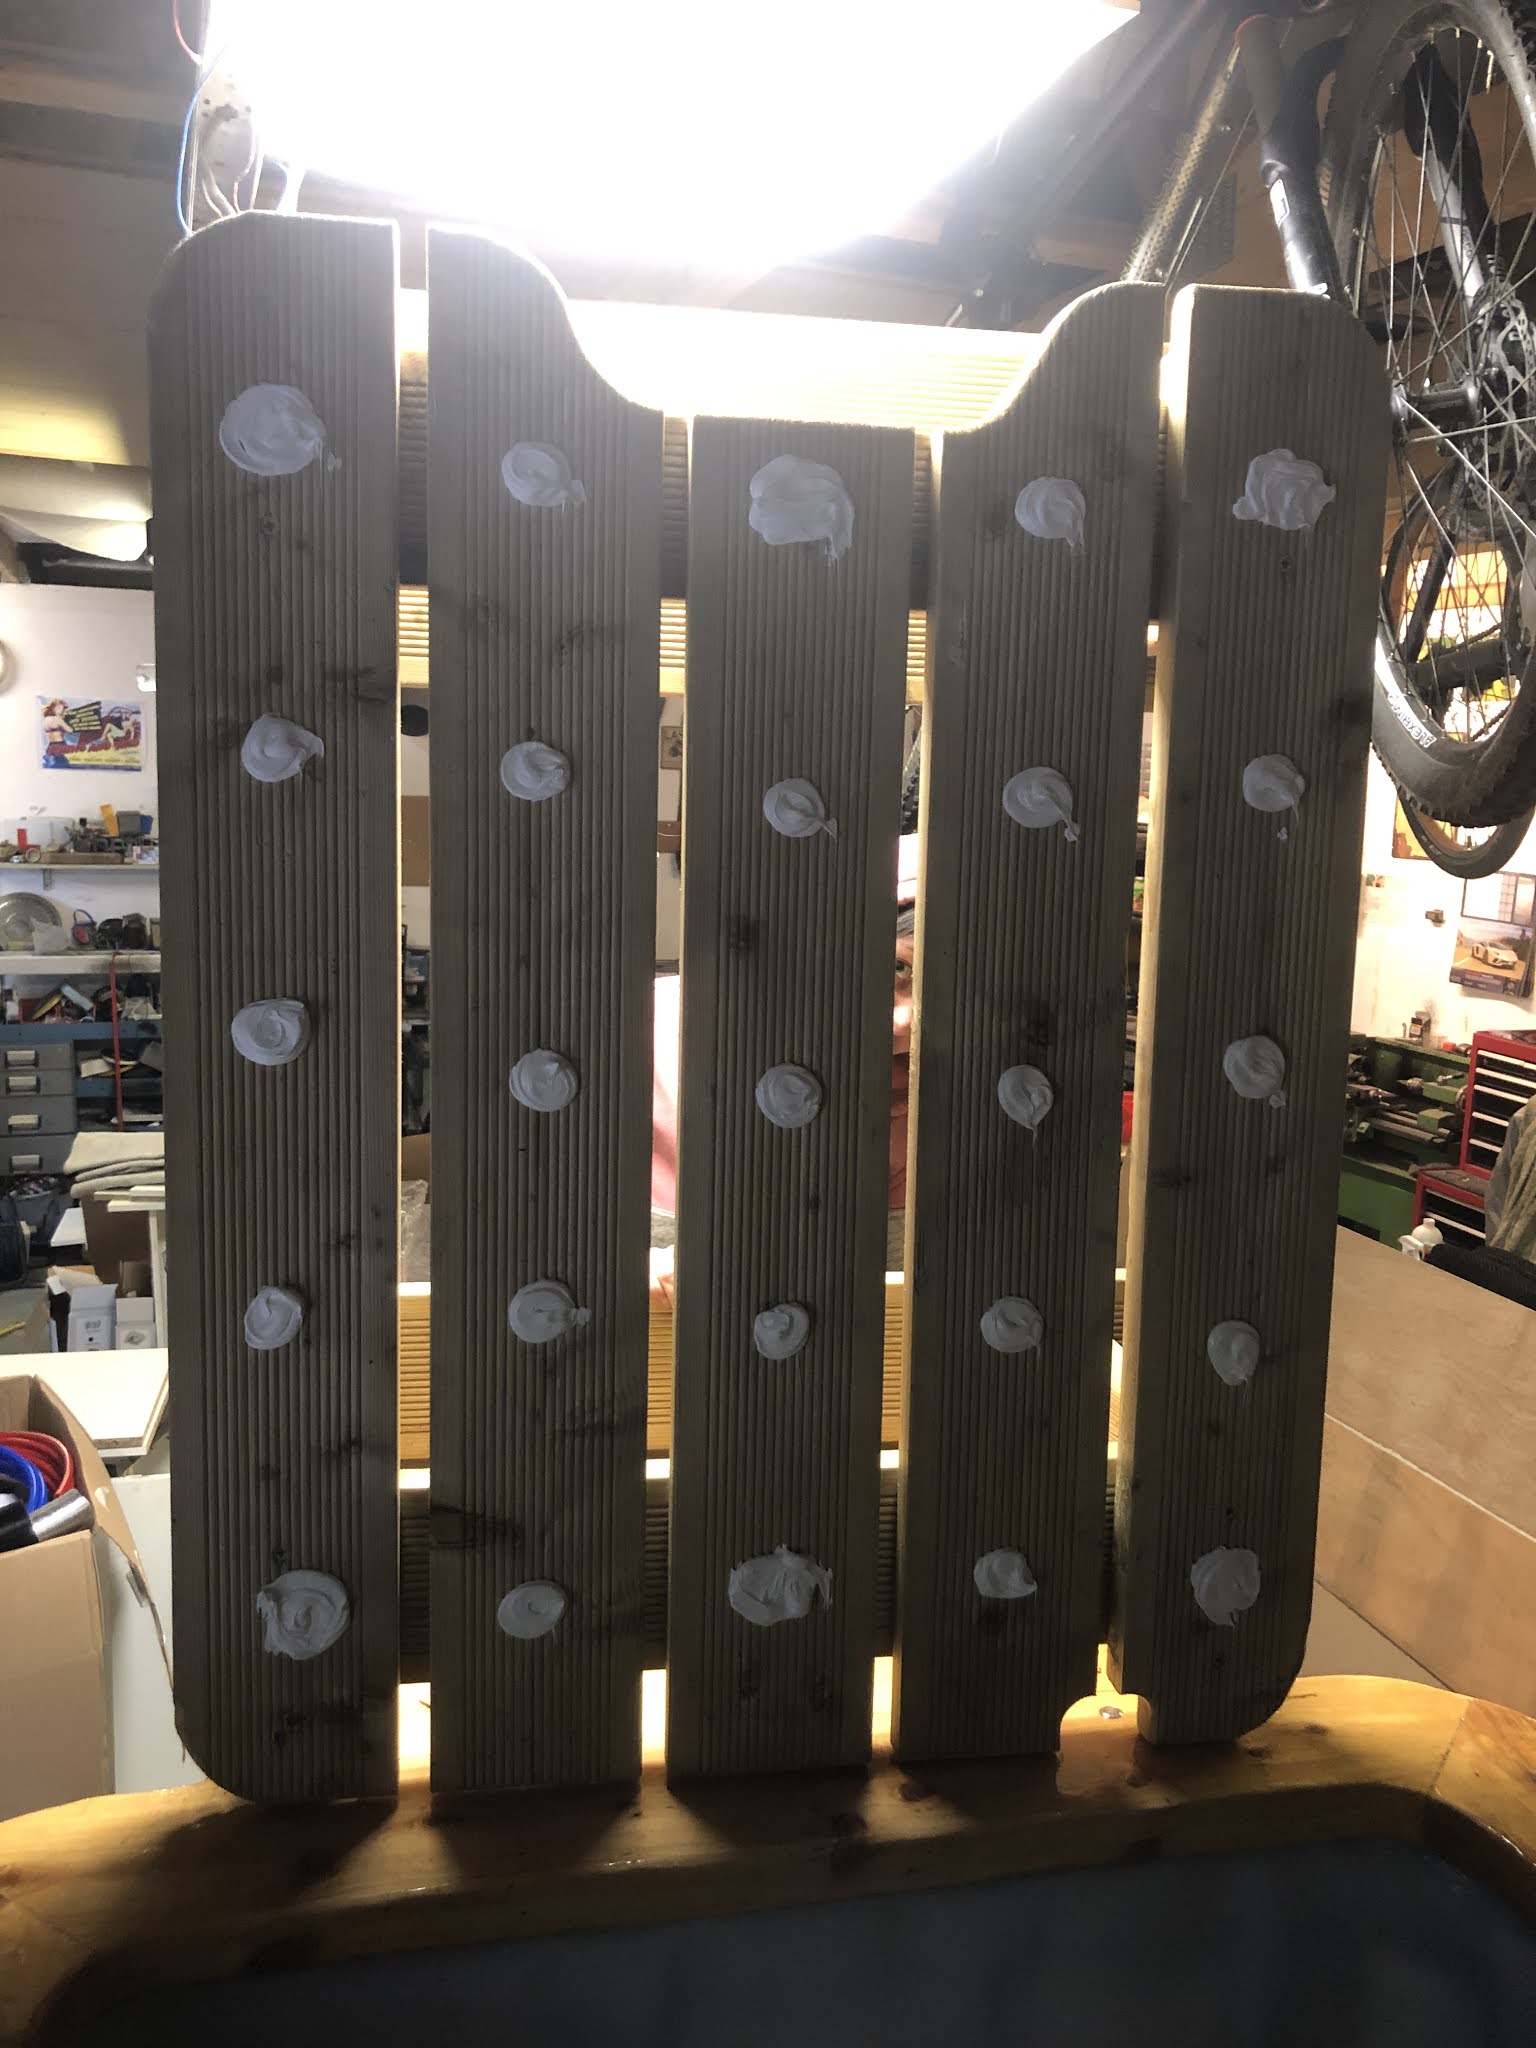
The only issue with had with the first hot tub, is that we were too impatient and hadn't yet glued the seating down to the base of the tub, and those seats are very buoyant, even with humans sitting on them!

The hot tub stays warm overnight, dropping only a few degrees. So if we wanted to use it a few days in a row it would be so quick and only cost a few pence of gas to heat back up.

When draining, the whole tub drains in less than two minutes.

So in just 6 weeks and spending just £X, we have created this ridiculous trailer hot tub! We are super proud of it and can't wait to take it on many many adventures!

What have I personally learned...?
- Time-lapsing drains your iPhone battery
- Round-the-corner screwdrivers are a thing
- Soldering isn't that scary
- Always measure twice, in case it's shrunk
- Snake screwdrivers are a thing
- Varnish applied more than 0.5mm thick will never ever ever dry
- There's a tool called a 'nibbler'... it nibbles!
- You should not varnish in windy conditions in blossom season
- Insulation makes you sneeze a lot. You can get whiplash from sneezing.
- Silicon does not come off your hands easily
- Decking is VERY buoyant!


What would we change...?
- We need to fix these seats down! 
- Not sure if we would finish it in varnish... The natural unfinished look was actually very nice..
- Build a custom trailer for the hot tub, so it is lower
- Some nice alloy wheels?
- Adding a thermometer and thermostatic controls for the boiler (we might still retrofit this!)
- Add bluetooth capability to the LED lights so they can be controlled via an app


Will we take commissions? 
Sure. But the costs will be vastly different from our original build! We don't hoard that much stuff!

If you see us out and about give us a wave, come and chat to us and have a dip in the tub!

We welcome any comments, feedback, emails, whatever.

#TrailerHotTub

#VanLife

Sunday 17 May 2020

FINISHED! The first test hot-tub

The hot tub is coming home!!! It's a gorgeous day, sunny and warm so perfect weather for the first test hot tub! I'm aware of how ridiculous this looks and we get a few weird looks on the short drive to the back garden.


We set it up in the back garden, next to the BBQ


We connected a (very shit) garden hose to the hoselock connector, and filled it with this, running the water through the boiler, which heats the water instantly to around 40 degrees. This means once it's filled it's ready to use, a massive advantage to conventional hot tubs which take hours to heat once filled.


We are SO ready...


It's hot, comfy and the bubbles and LED lights are awesome. This is our time to reward ourselves for our hard work in creating this build!


CHEERS!


Wednesday 13 May 2020

Varnishing and finishing touches...

The finishing touch is to varnish the outside wood. The top edge is painted with gloss yacht varnish for a super shiny finish, and the rest of the cladding and decking is finished in Ronseal matt varnish.


We did three coats of varnish (well... actually 4 as the first coat we fucked up and put it on far too thick and it would never have dried so we spent an hour and a half scraping that off and re-sanding it.... But there's not photos of that... )


The final touches were to silicon seal around the top edge of the tank to stop any moisture from getting into the wooden top, and we fitted a trim around the heater vent.


Oh look... A new van seems to have appeared... Ripe for a camper conversion... NEXT PROJECT PLZ

EDIT: I will blog about the campervan conversion on a separate blog here


Tuesday 12 May 2020

Creating the seats inside the hot tub

One of the last tasks was to create the base and seating for within the hot tub. We had just enough decking left to achieve this!


The base was of decking and of course curved to fit snugly inside the bottom of the hot tub...


The uprights for the seating was fashioned out of some more random wood hoarded in the workshop...


Looking pretty comfy...


Here's the seats in situ with the lights going!


Saturday 9 May 2020

Electrics

Next I learn a bit of electrics! Wine and electricity... What could possibly go wrong...?


I soldered this 😁...


Before soldering actual useful stuff...


All the electrics will be mounted hidden away alongside the boiler... Here is the 12v socket and USB charging point.


The controls for the boiler and the bubbles are small simple on-off buttons mounted on the top edge of the tub. The LED lights are controlled with a infra-red control panel that came with the lights.


The 12v leisure battery is hidden under the lower step, in a little cupboard.


Wednesday 29 April 2020

Creating steps

Next was to create a set of steps, to hide both the gas canister and the 12V battery. This was made using a simple frame of wood batons.

That characteristic curve around where the gas bottle would sit was created using metal trim that could be bent into the curve.


The steps were clad again with fence posts, processed in the same way as the rest of the cladding.


 The tops of the steps are made from decking, to match the rest of the base.


Thursday 23 April 2020

Making a drain pipe

So the IBC already comes with a tap and drain however this drains out horizontally. So we fashioned a drainage pipe to attach onto the existing tap so that we can drain the water vertically directly under the hot tub.


A hole was drilled from the underside of the trailer to accommodate the new drain pipe.


Wednesday 22 April 2020

Making the top edge of the hot tub

We weren't sure what to make the top of the hot tub out of. We wanted something chunky and rustic to match in with the rest of the build. ?Decking. But then we were pretty short of decking and still haven't made the steps or the seating...


Then Elliot remembered some old boards that used to be used for getting cars up onto trailers... And decided they could be sacrificed as a hot tub top!

We cut the edges at 45° angle and screwed and glued them together using strong wood glue which was left overnight to cure


Once securely glued into one piece, the surfaces were sanded to give the same rustic sort of finish as the cladding


This little hole was filled in... 👌 (Not really sure why this is in here but Elliot was proud of it!)


The edges were cut to form those beautiful curves...


Would make a good picture frame... huh? 😁


Curves were also cut on the inside edges with the jigsaw.


And the inside was also sanded...


The top edge was secured to the rest of the build by way of brackets mounted hidden behind the cladding.


This top edge is looking awesome!!